If you’re an experienced Keurig user, you probably know a lot about maintenance. These single-serve brewers are incredibly convenient, but you do have to clean them regularly. There’s one aspect you may not have thought of: Keurig needle maintenance.
Don’t worry, this doesn’t need to be a difficult process. We’ll show you how to easily clean your Keurig’s needle — without adding too much time to your cleaning process. Scroll down to find our simple step-by-step guide:

Why Do You Need to Clean Keurig Needles?
Your Keurig brewer’s needle punctures K-Cups, pushing through the foil lid and into the coffee grounds inside. As a result, coffee grounds can easily build up in the needle over time — which isn’t very sanitary and could affect the flavor of your coffee. Even worse, this buildup can get in the way of your Keurig’s water flow, keeping it from brewing a tasty cup of coffee!
The biggest thing to remember when cleaning a Keurig needle is to be careful. It’s very sharp, so you don’t want to hurt yourself. It’s also an important part of the machine, so you don’t want to break it by accident.
What Will You Need?
The easiest way to clean the needle is by using Keurig’s brewer maintenance accessory tool, which comes with all Keurig 2.0 models. Don’t have one? No problem! You can buy one for just a few dollars. Another option is Keurig’s brewer maintenance kit, which includes disposable rinse pods and works with Keurig 1.0 and 2.0 models.
How to Clean a Keurig Needle:
Here is our guide to cleaning a Keurig needle using Keurig’s brewer maintenance accessory tool. You can find other methods below!
1. Turn off your Keurig.
Power your Keurig down and unplug it.
2. Fill the brewer maintenance pod with water.
If you’re using the brewer maintenance accessory tool, pour water into the plastic cup in the center.
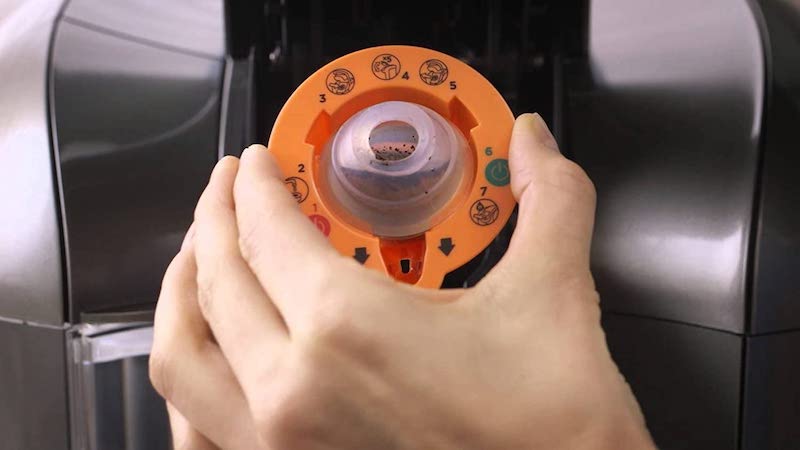
3. Open the brew head and place the tool in the cupholder.
The accessory tool should fit snugly in the K-Cup holder. Make sure the arrows are pointed at you and the power button is on the right.
4. Open and close five times.
Carefully close the brew head on the tool. Then open and close it five more times.
5. Take the tool out.
Open the brew head and carefully remove the cleaning tool. You will notice that it has small coffee grounds in it. That’s good news — you’ve cleaned them out of your needle!
6. Run three cycles with water.
Don’t insert a K-Cup, but ensure that the water reservoir is full. Run three brew cycles with just water to flush out any remaining coffee grounds.
7. Enjoy your clean brewer!
That’s it! Your Keurig needle should now be clean and ready to puncture another delicious K-Cup.

Keurig Needle Maintenance: Alternate Methods
Don’t want to buy another Keurig accessory or have a Keurig 1.0 model? No problem. Here are two simple methods for cleaning your Keurig needle:
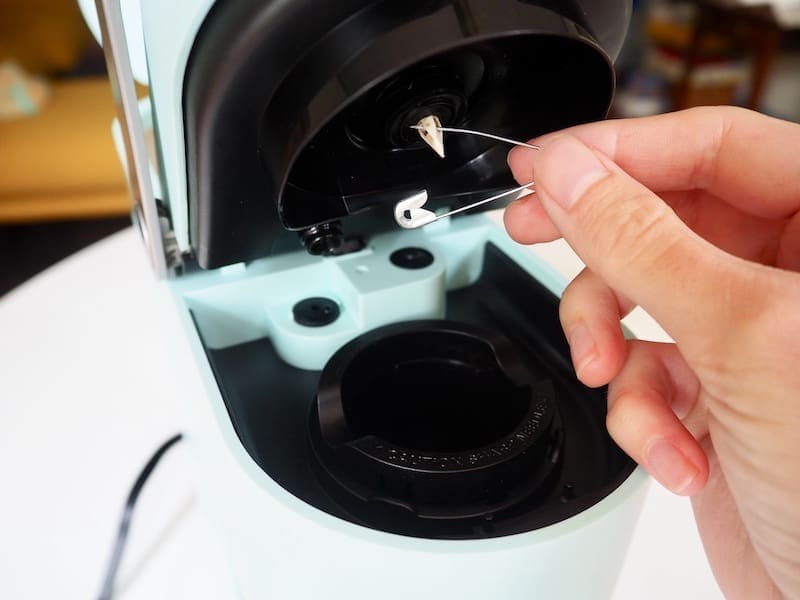
1. Using a paper clip or safety pin:
After turning off your Keurig and unplugging it, open the brew head. Take a close look at the needle that points down toward the K-Cup holder. If you see any coffee grounds or buildup, use a paper clip or safety pin to carefully scrape them out. The needle is very sharp, so you will need to work carefully and slowly.
Once you’ve removed all visible buildup, close the brew head and run three cycles of water through the Keurig.
2. Using the rinse pods:
If you have Keurig’s rinse pods, this process will be even easier! The rinse pods work just like regular K-Cups. Place one in the K-Cup holder and brew an 8-ounce cup as usual. Then remove the pod and run a rinse cycle. Voilà!

Keurig Needles: Conclusion
We hope this guide helps you quickly clean your Keurig needle. No one wants to spend too much time and money on coffee machine maintenance, and luckily this process is very simple. Using any of these methods, you should have a sparkling Keurig in under 10 minutes! Choose between Keurig’s brewer maintenance accessory tool and rinse pods, or opt for the more hands-on paper clip method.
Keeping your Keurig clean and ready to brew takes some time, but it is not difficult. Keurig needle maintenance is one of the most important things you can do to keep your machine running well. If you’re still having issues, try one of our other Keurig troubleshooting guides: