We are going to take a break from our usual gear reviews and brewing tutorials, brush the coffee grounds off our hands, and have some fun! In this article, we will show you some fun crafts you can make with coffee filters. Coffee filters are absorbent, malleable, and easy to work with, making them perfect for use in arts and crafts.
You don’t have to be a kid to enjoy these simple art projects, but they are family-friendly, and with some adult supervision, they are great for kids. Roll up your sleeves and join us for some fun coffee filter crafts!

Top 4 Fun Coffee Filter Crafts:
1. Coffee filter rhododendron
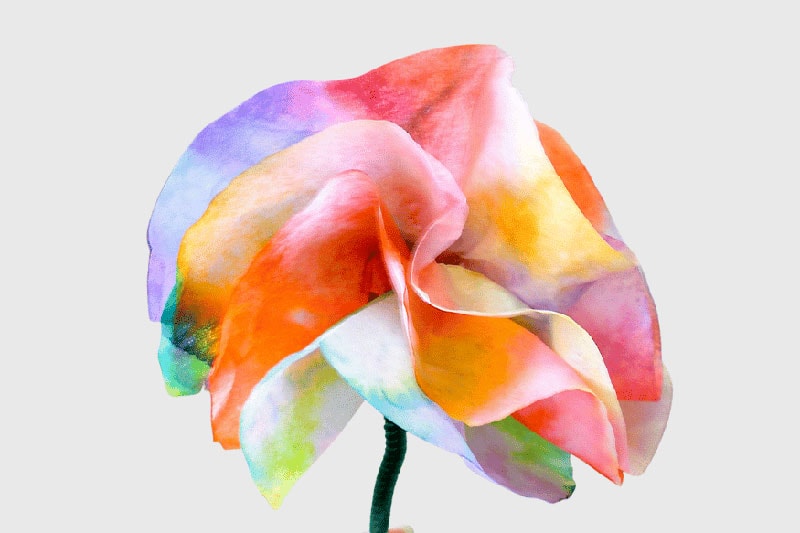
Coffee filter rhododendrons are an excellent project for kids because they look great despite being easy to make. You can make a single flower or combine multiple flowers to make an arrangement or bouquet. It only requires a few accessible supplies and about 10 minutes. See the full tutorial here.
- 1-4 coffee filters
- Markers
- Spray bottle filled with water
- Wax paper
- Pipe cleaners
- Something to protect your working surface
- Before you do anything else, put down a cloth or towel to protect your working surface. If you don’t, you will have a new tie-dye table when you’re finished.
- Take a piece of wax paper big enough to place up to four coffee filters on without them overlapping.
- Here’s where the fun begins. Use the markers to color the filters. We’re going to soak the filters with water in the next step to get the colors to bleed together, so you can go wild here. Each coffee filter is going to become the petal of your flower, so our recommendation is to keep each filter’s color in one color family. If you use too many different colors on a single filter, you might wind up with an ugly black flower.
- Lay the colored filters out flat on the wax paper and give them a few sprays with water from the spray bottle. Usually, 3-5 sprays will do the trick.
- Let the filters dry completely.
- Now we’re going to fold the filters in a zigzag pattern to make the petals. Start by stacking the filters – if you used more than one – and fold them in half and then in half again. You should have a triangular cone shape at this point.
- Now fold the top flap back on itself halfway. Flip the filter over and do the same thing on the other side. If you’re confused, think of an accordion. You want the filters to make a squashed “z” shape.
- Now wrap the point of your z-shaped cone with a pipe cleaner to make the flower’s stem.
- Separate the petals however you like to create the petals of your flower.
2. Coffee filter rose
This one is similar to the first project but makes an elegant rose instead of a puffy, rhododendron-like flower. It’s even easier than the first project but looks just as lovely.
- 1 coffee filter per flower
- Markers
- Spray bottle filled with water
- Wax paper
- Pipe cleaners
- Scissors
- Something to protect your working surface
- Once again, start by protecting your working surface and preparing your wax paper.
- This time, instead of multiple colors, use only one color. Red, pink, and yellow are popular choices and give the rose an authentic look. Color the filter with one solid color.
- You can spray the filter to help fill in any gaps in your coloring. Only a few sprays – one or two – are necessary.
- Let the filter dry completely.
- Cut a slit in the filter, starting from anywhere on the edge and extending to the center.
- Roll the filter up slowly, starting at the slit and continuing until you make your way around the entire filter.
- Use a pipe cleaner to tie the bottom of the rose petal and hold the rolled-up shape.
3. Coffee filter daisy
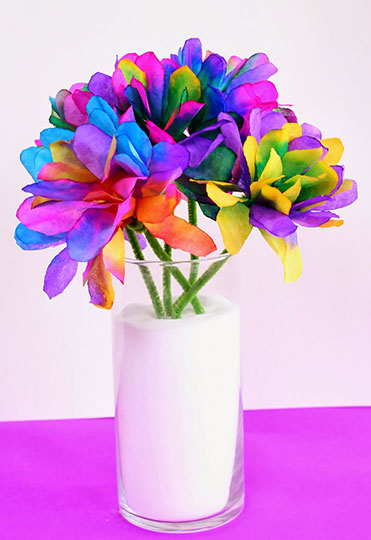
Continuing our way through the various flower species, this one is reminiscent of a daisy. You’ll need a few more supplies than you did for the previous two projects, but we think the result makes it worth a little extra effort. See the full tutorial here.
- 2 coffee filters per flower
- Liquid watercolor
- Eyedropper
- Wax paper
- Pipe cleaners
- Scissors
- Something to protect your working surface
- Start by protecting your working surface and preparing your wax paper.
- Flatten two coffee filters and lay one on the other.
- Fold the pair of filters in half, then fold them in half again, then in half again, and in half one last time. That’s a total of four folds in half for those keeping track at home.
- Take your four-times-folded pair of coffee filters and cut an arch shape about one-third of the way down from the top end. This cut forms the petal shapes.
- Now unfold the filters and carefully cut down the fold lines you created. This gives the separation. How far down you cut is up to you. Be careful not to cut so far down that the petals can easily rip and become detached from the flower.
- Lay the flower on your wax paper and use an eyedropper to add one or two drops to each petal carefully. You can get creative here and make each petal a different color or stay traditional and give your coffee filter flower a realistic color scheme. One idea we like is leaving the tips of the petals uncolored for a cool, white-tipped effect.
4. Coffee filter butterflies

We know we’re breaking the flower theme, but butterflies love flowers, and coffee filter butterflies are right at home perched atop a coffee filter flower. This is the most complicated coffee filter craft and is better suited for slightly older children. It’s not overly difficult, though, and is the perfect way to add some extra character to your growing collection of coffee filter flowers.
- 2 coffee filters per butterfly
- Markers
- Water
- Eyedropper
- 1 pipe cleaner per butterfly
- Wax paper
- Something to cover your table
- Prepare your workspace by covering the table and laying at the wax paper as usual.
- Flatten out both filters, one on top of the other.
- Using the markers, color the top filter and let the marker bleed through to the second filter. The filters will make the butterflies wings, and this method will make sure the wings are symmetric like a real butterfly.
- Use the eyedropper to wet the entire filter. Don’t use too much water here. You don’t want the design to smear so much that it becomes blurry and non-descript. Go slowly with this step and stop as soon as the entire filter is wet.
- Let the filters dry.
- Once the filters have dried, peel them apart. You should have two colored filters that are nearly identical.
- Fold each filter individually, starting at one side and folding back and forth in an accordion style. Make each fold about a half-inch wide. It will take about 10-12 folds to reach the other side of the filter.
- Sandwich the filters together and tie a pipe cleaner around the center. The pipe cleaner holds the wing filters together but also makes the butterfly’s antennae.
- Twist the pipe cleaner until the ends for a “v” shape. Give the ends a slight curl to mimic the curl of a butterfly’s antennae.
- Fan the wings out by opening the folds. You might have to mess with this part a little bit to get the butterfly just how you want it.

Coffee Filter Crafts: Conclusion
We hope you enjoyed these fun coffee filter craft ideas! Sometimes it’s nice to take a break from the hustle and bustle of life to do something creative. These crafts are perfect for kids but, if we’re honest, we had a blast making them too. They’re easy to make, look great, and only require a minimal number of supplies. If you’re looking for something fun to do next time you have a rainy day on your hands, break out the coffee filters and start crafting your own coffee filter garden! Coffee filter bouquets also make great gifts.
RELATED READS:
- 5 Effective Coffee Filter Substitutes Found in Your Home
- 14 Smart Uses for Coffee Filters: Recycle & Save Money
- What’s the difference between brown and white coffee filters?
Featured Image: The Photobooth food, Shutterstock


